Summary: When you get a new hard disk, you need to create and format partitions before you use it normally. Here, you will learn two completely free methods: Command Prompt utility and third-party GUI partition software.
Why do we need to create and format partitions in Windows computers?
As we all know, after getting a new hard disk, we first need to partition the hard disk. Because the new hard disk is empty, there will be storage areas only after partitioning. Formatting is required after partitioning, because formatting creates tracks and sectors in the hard disk. After formatting, the computer can recognize the hard disk and store data.
How to create and format partitions easily and quickly?
Next I will demonstrate the whole process of creating and formatting partitions using CMD and third-party freeware for you.
Method 1. Use command to create and format partitions
It is a good way to use Windows 10’s built-in Command Prompt to create and format partitions. You can manage the partitions by running the corresponding commands.
To begin with, press “Windows + R” and type “cmd” in the new window. Then, type “diskpart” and hit Enter. After that, you can follow the instructions to create and format the partition.
For creating a new partition on hard drive, there must be unallocated space on. If not, please shrink the other spare partitions to get unallocated space. Run the following commands in sequence and
- list disk
- select disk
- create partition primary
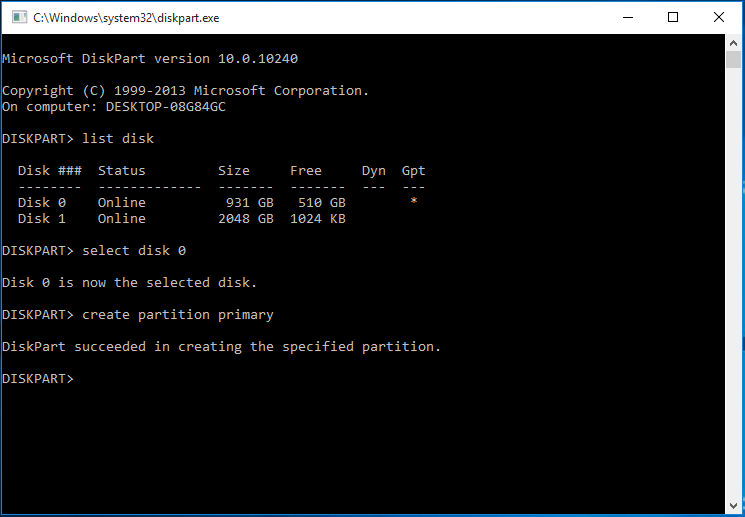

After completing this step, you will create a new partition on the hard drive. If you want to be precise about the size of this partition, you should type “create primary partition size=N”
If you want to format the partition, then you only need to type the following instructions and hit Enter.
- format fs=fat32 quick


Method 2. Create and format partitions via AOMEI Partition Assistant
Using Command Prompt is certainly a good choice, but it is not easy for people who do not have computer knowledge. People without computer knowledge don’t know how to enter command indicators. And you cannot directly create a FAT32 partition beyond 32GB Via Command Prompt in Windows.
Thus, it’s advised to use AOMEI Partition Assistant Standard, a free disk management utility(it supports Windows 10/8.1/8/7/Vista/XP).
This software can make up for the shortcomings of Windows native tools. Employing the strong third-party hard drive partition manager, you can create and format a partition that is larger than 32GB with the FAT32 file system. In addition, it has more useful functions, such as resizing partition, cloning disk, wiping partition, and so on.
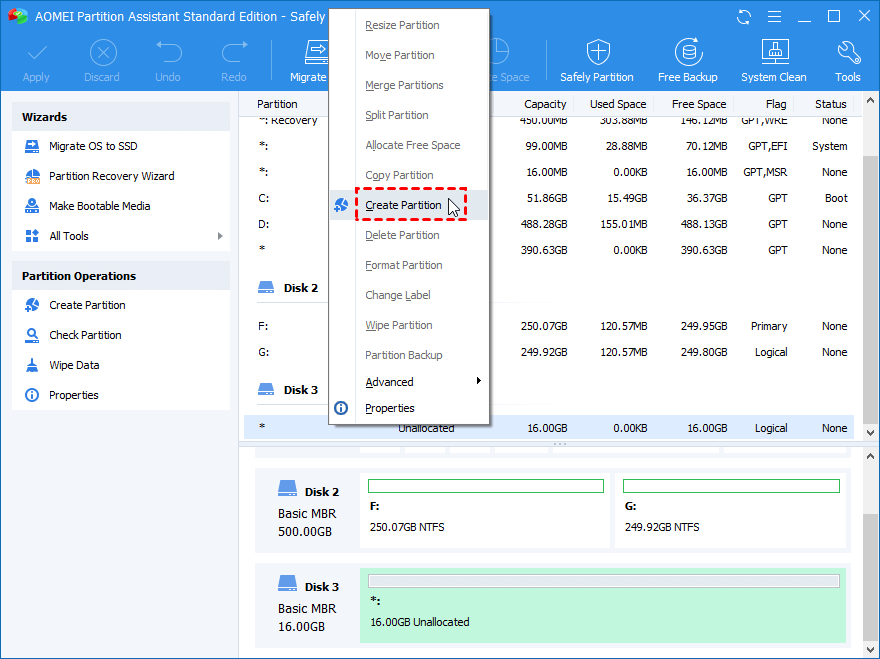
Step 1. Download, install and run AOMEI Partition Assistant Standard. Right-click the hard disk you want to create a partition in the main interface and select “Create Partition”.

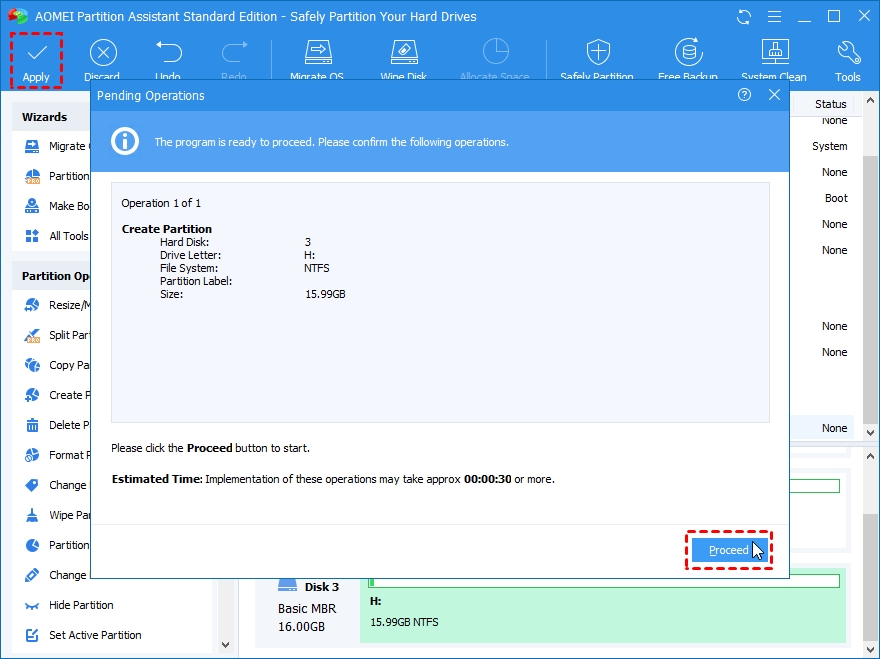
Step 2. In the new window that pops up, you can customize the size of the partition, drive letter. In addition, you can also set this partition as a primary partition or a logical partition and select file system.

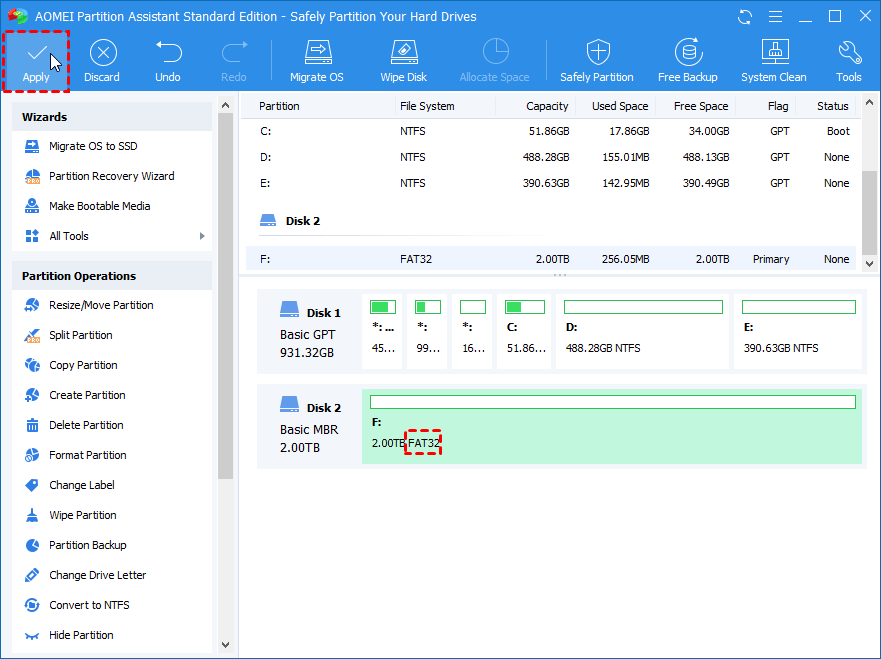
Step 3. At this step you can preview the previous operation, don’t forget to click “Apply” to generate a new partition.
After that you can use your hard drive normally.
Further reading:How to reformat a partition
After you create and format the partition, what should you do if you want to change its file system?
Here are the detailed steps:
Step 1. In the main interface, right-click the partition you are going to format, and select “Format Partition”.
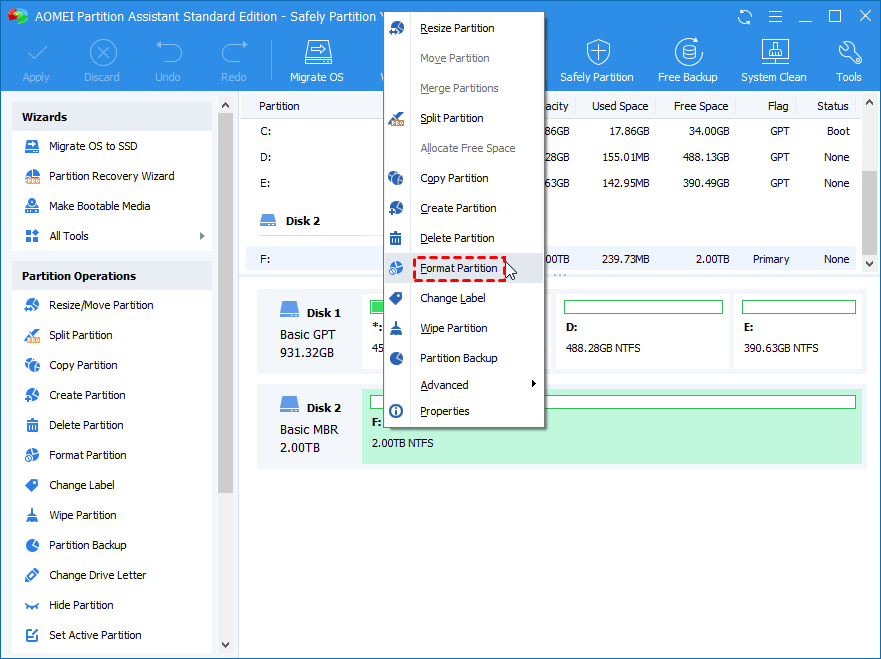

Step 2. In this window, select “File System”. (Take FAT32 as an example here).
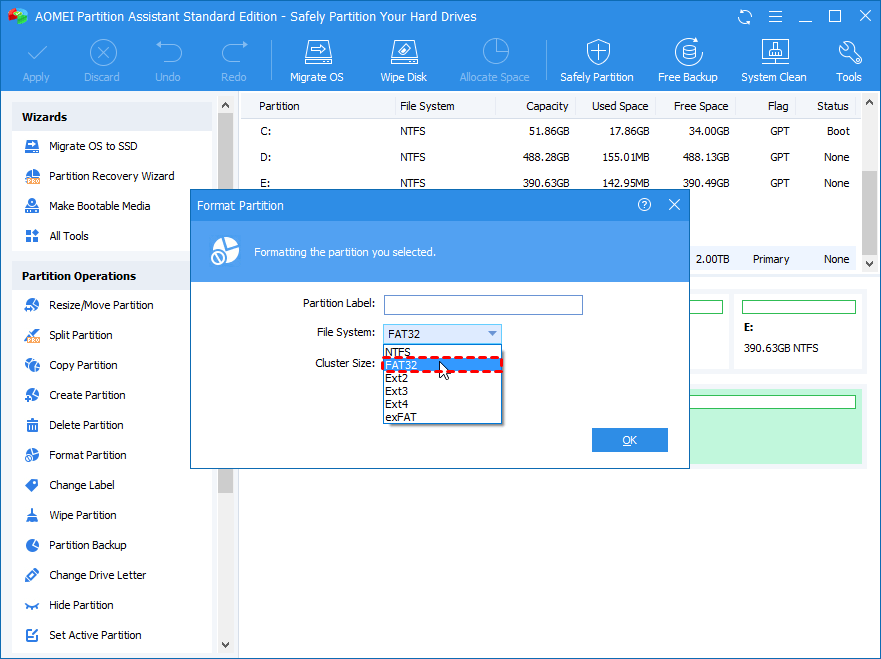
Step 3. After previewing the operation, don’t forget to click “Apply” to generate the operation.
Bottom line
The two methods described in this article are both effective methods for creating and formatting partitions. If you have a certain computer background and don’t want to use the third-party software, then I suggest you use Command Prompt; if you don’t have any experience with computers, then AOMEI Partition Assistant Standard will be your best choice.
Follow Techdee for more!