
Part 1: Introduction
Streaming media has become pervasive in our everyday lives due to the rapid development of the Internet. The percentage of people who choose to spend their time viewing videos on YouTube, TikTok, Vimeo, Netflix, and other video platforms.
More and more individuals are willing or even eager to film, edit, and publish movies on their own in various disciplines, including technology, gaming, education, beauty, gastronomy, and so on.
Apart from editing videos, one other aspect starts from screen recording the video and then editing it according to your desire. To help you with all that, Joyoshare Vidikit – the Best Screen Recorder for Low End PC, is software that can record your screen and provide some of the coolest editing tools. Learn more here!
Part 2: Body
Part 2.1: How to Screen Record by Using Joyoshare VidiKit
A good video recording program would be essential for most individuals to record their computer screen, covering games, video streaming, Skype video chats, seminars, and lectures, among other things.
Joyoshare VidiKit (Screen Recorder) is an excellent screen recording tool. It can record any desktop activity involving video and audio without causing any quality deterioration on your computer because it’s a full-featured video recorder.
Here’s how you can use Joyoshare VidiKit as a screen recorder for low-end PC:
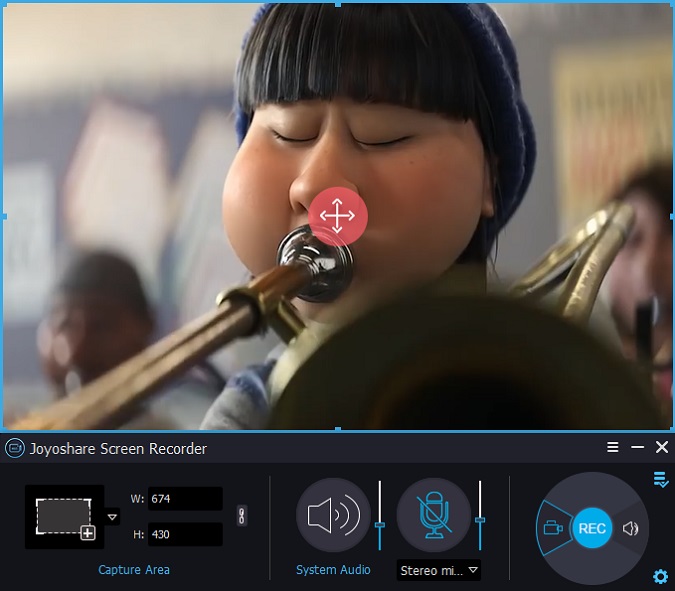
Step 1: To use Joyoshare Screen Recorder, double-click the app icon on your desktop once it has been installed. Then you’ll see the window below.


Step 2: Select the + button in the Capture Area to bring up the recording pane. The recording window may then be scaled and moved to suit your needs, allowing you to pick a full screen or a bespoke recording region. You may also pick a fixed recording window size from the drop-down menu, such as 320×240, 640×480, 1280×720, and so on.
(Note: Joyoshare Screen Recorder also has an audio capture feature that allows you to record the sound solely from your PC. Click the Record Audio icon next to the Rec button to record audio rather than footage).

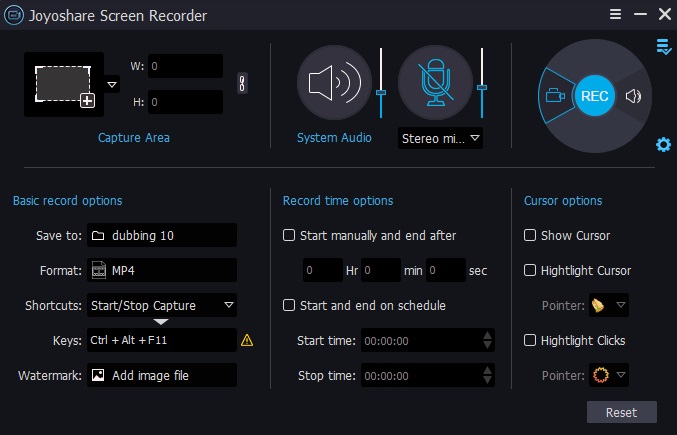
Step 3: In the bottom right corner, select the Options icon to make recording settings before capturing the screen. You may modify recording shortcuts, establish scheduled recording jobs, tailor cursor effects, and other choices here, depending on your needs.

Step 4: Open the application you wish to make a video recording. Then press the Rec button to begin high-quality screen recording. You may snap screenshots at any moment throughout the recording procedure by clicking the scissor symbol.
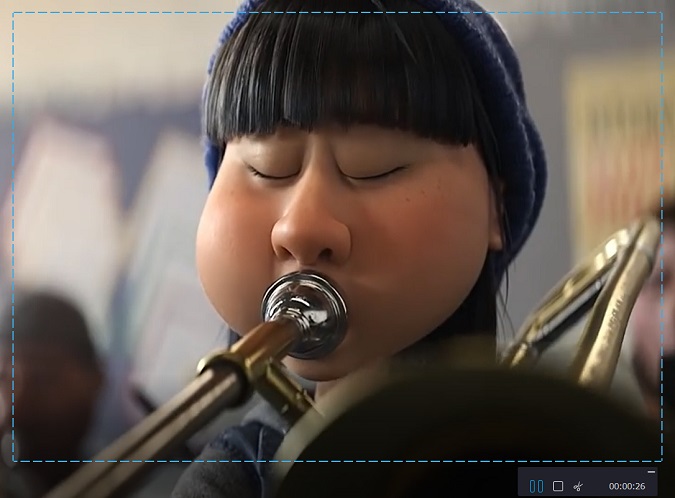

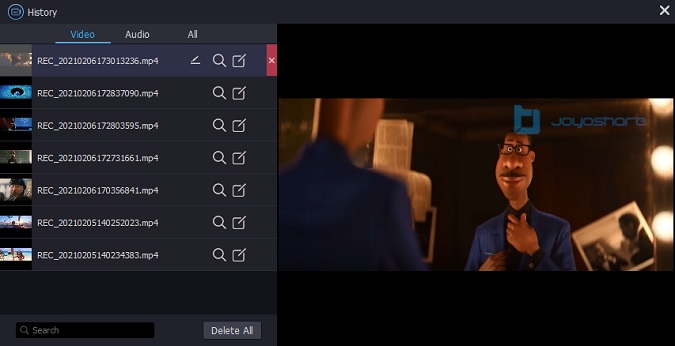
Step 5: Click the Stop symbol next to the Pause button to end the recording. Next, in the History pane, you may examine the recorded files and adjust their names and ID3 tags as needed.

Part 2.2: Other Features of Joyoshare VidiKit
By this point, you would have a good understanding of some of the standout features of Joyoshare Vidikit. However, there is a lot left to it still. The following are some features that make this editor the most sough-after program among professionals:
-
Video Cutter
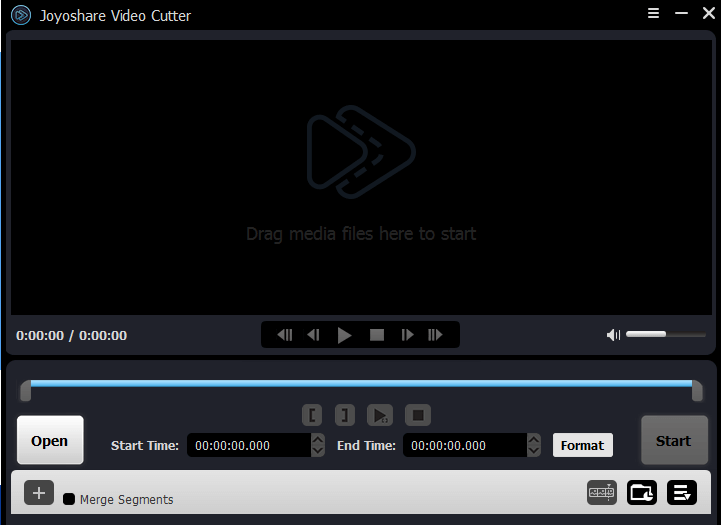

Video cutting technology has progressed significantly. In VidiKit, you may precisely clip videos using the control keys provided or define temporal periods. The program allows you to easily choose timescales and cut off areas of your movie that you don’t want.
Alternatively, you may manually clip undesirable areas of your movie and examine the progress of your work in real-time by manually choosing start and finish times.
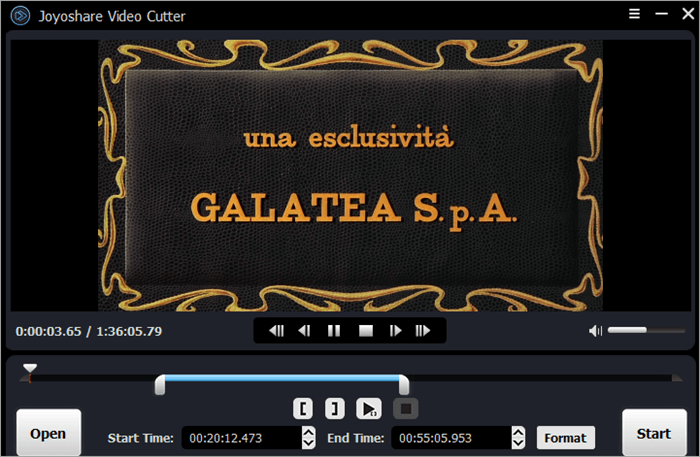

The program also has a significantly faster-cutting speed than most of its competitors on the market today.
-
Video Converter
Converting videos using Joyoshare VidiKit is a breeze. This program allows users to upload and convert movies in three simple steps to various output formats.
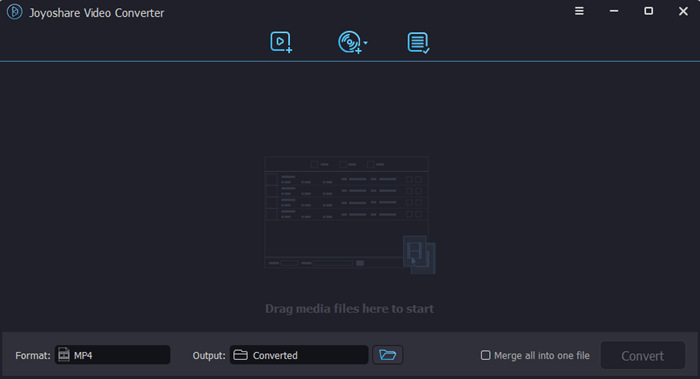

Step 1: You may either drag and drop the file type you want to convert into the interface or upload it by clicking the upload button at the top.
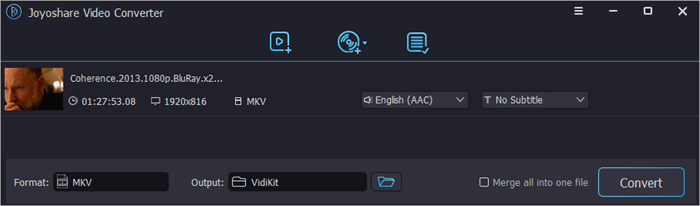

Step 2: To convert the file, go to the bottom left corner of your screen and pick the output format. You’ll be given the choice of starting the conversion in either High-Speed or Encoding Mode.


Step 3: Click Convert on the bottom right side of the display once the required modifications have been made. The transformed video would be saved in a location on the system that you specify.
Step 4: The converting procedure is lightning quick when you choose the High-Speed Mode. We converted a 3-minute MP4 file to MKV in under a minute. You can also do batch conversions with the program because you can upload and convert several movies simultaneously.
-
Video Compressor
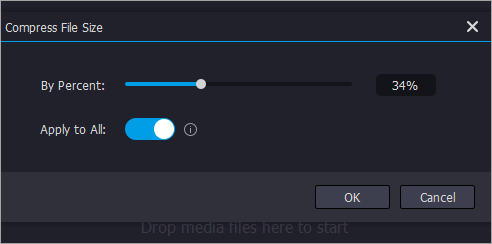
Joyoshare VidiKit lets you process and compresses files to make them smaller at your leisure. VidiKit has two video compression settings. You have the option of compressing by file size or by percentage. The compression procedure is straightforward and may be completed in just a few stages.
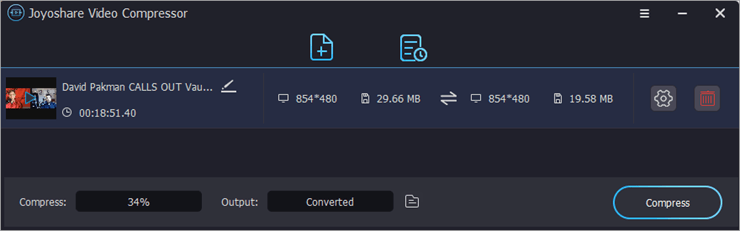

Step 1: Open Video Compression from the Convert option.
Step 2: Drag and drop the content you’d want to compress now. Instead, you may upload the file you want to compress by clicking on ‘Add Files.’ The interface will display the video you uploaded, along with information about its resolution, size, and duration.
Step 3: You may manually adjust the compressed size by reducing or raising the compressing ratio. Choose the location on the computer where you want to save your compressed video in the Output box.

-
Remove Watermarks
Yes, you read that right. Joyoshare allows you to remove watermarks from your videos and make them look as unique as possible. Here’s how:
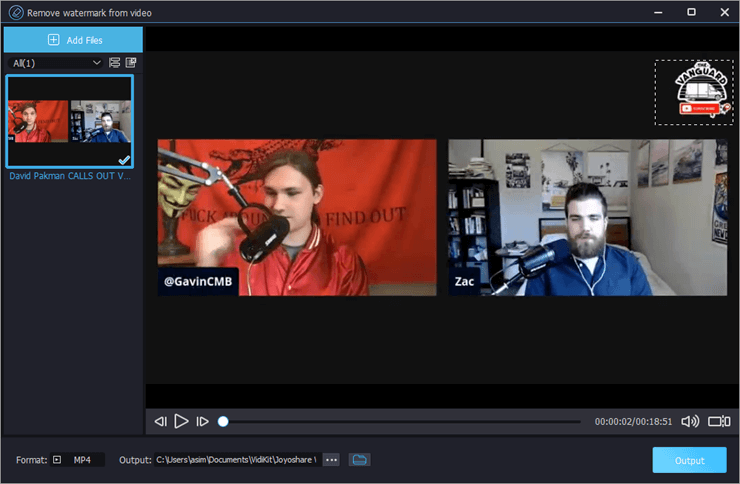

Step 1: Open Watermark Wizard from the ‘Repair’ area. To erase a watermark from your picture or video, choose ‘Remove Watermark from Video’ or Remove Watermark from Image.
Step 2: Remove the watermark from your Picture or Video by selecting it.
Step 3: Once the video or image has been selected, select Output to save it to your device without the watermark.
Step 4: Once that’s done, go to the lower right-hand side of your screen and select Compress.
Part 3: Conclusion
Joyoshare VidiKit, in retrospect, is a user-friendly video toolbox that allows users to edit, record, repair easily, and improve their video, audio, and picture files. The Best Screen Recorder for PC can handle a wide range of video and audio formats and perform seamlessly on Windows and Mac-based systems.
Using this program, you can convert, compress, and edit movies at lightning speed. Once Joyoshare has finished editing your films, there will be no degradation in quality.
Its multi-functionality allows it to serve various content producers and users. Joyoshare, an affordable tool with a profusion of capabilities in a single, comprehensive program, is becoming increasingly rare these days.
If you like the article then follow Techdee for more!