
Add Animation to a Video
Have you come across videos uploaded on YouTube or Facebook where mind-blowing animations have been added to the video, making it look mesmerizing? After watching the video, you’d have thought about how to add Animation to a video.
Luckily, adding animations to a video is a relatively easy job. Instead, you can apply the mind-blowing animations to the video without putting in the hard yards.
Dive into this post to learn how to add animations to videos.
Part 1. Why Add Animation to Your Videos?
There are several reasons why adding Animation to your videos can be beneficial:
Visual engagement:
Animations capture attention and keep viewers engaged throughout the video, making it more enjoyable to watch. Enhanced storytelling: Animations can help you convey complex ideas, illustrate concepts, or emphasize key points, enhancing the storytelling aspect of your videos.
Brand consistency:
By adding animations that align with your brand’s visual identity, you can reinforce brand recognition and create a cohesive experience for your viewers. Professionalism: Well-executed animations can give your videos a polished and professional look, elevating the overall quality of your content.
Part 2. Types of Animations for Videos
There are various types of animations that you can add to your videos:
Text animations:
Animating text elements can make them more dynamic and visually appealing. Examples include text appearing or disappearing, sliding in from the side, or pulsating with subtle motion.
Motion graphics:
Motion graphics involve animating graphical elements such as icons, illustrations, or infographics to enhance visual storytelling.
Special effects:
Adding special effects like explosions, sparkles, or transitions can create a dramatic impact and add flair to your videos.
Character animations:
If you have animated characters, you can incorporate them into your videos to make them more lively and interactive.
Overlay animations:
Overlay animations appear on top of your video, such as lower thirds, logos, or call-to-action buttons.
Part 3. Tools for Adding Animation to Videos

If you’re willing to add animations to the video to make it look more engaging and attractive, HitPaw Video Editor is the best editing tool you could use. Regardless of which type of animations you’re craving to apply to the video, HitPaw Video Editor comes up with sublime and eye-catching animations.
From allowing you to use images or GIFs, stickers, and text effects, to help you to apply flawless transitions to the video, HitPaw Video Editor has surely come a long way. On top of that, HitPaw Video Editor supports multiple video formats, and it doesn’t affect the resolution of video content while editing the video.
Features
- Comes up with eye-catching filters and effects
- Explore the gigantic transitions in one click.
- Offers the intuitive user interface
- Apply eye-catching text effects and stickers to the video content
- Crop or trim the without affecting the video quality
- Edit the audio parameters of the video easily
- Adjust the speed of the video
- Change the background of a video
Part 4. Step-by-Step Guide: Adding Animation to a Video, insert
Follow the guide below to learn how to add Animation to video through HitPaw Video Editor.
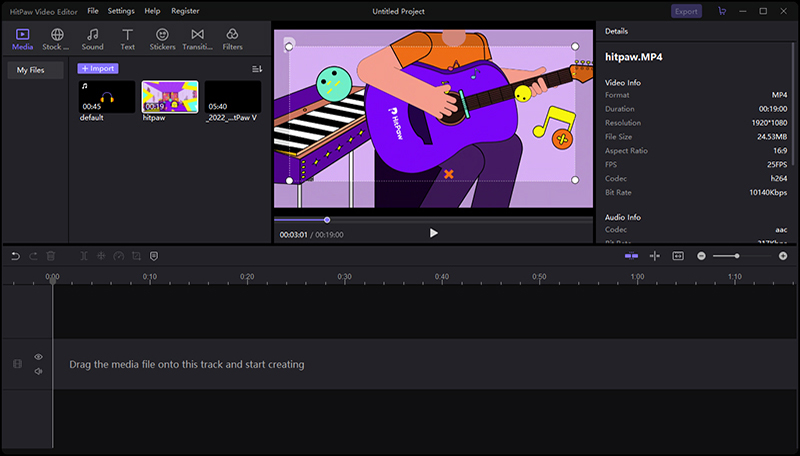
Step 1:
To begin with, you’ll need to import the video to HitPaw Video Editor. After dragging the video to the timeline of HitPaw Video Editor, you can add the video animations according to your preference.

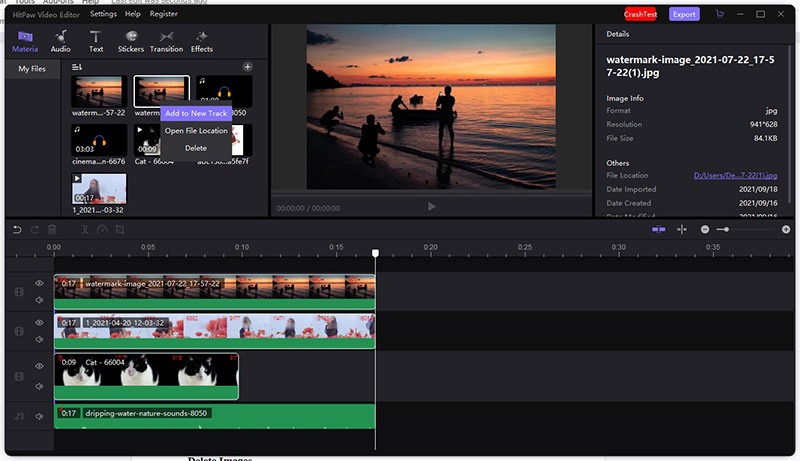
Step 2: Adding Image or GIF.
If you want to add an image or GIF to your video, you’ll need to press the image icon in the media library. You can then drag the video to the timeline after hitting the ”Add to New Track”.

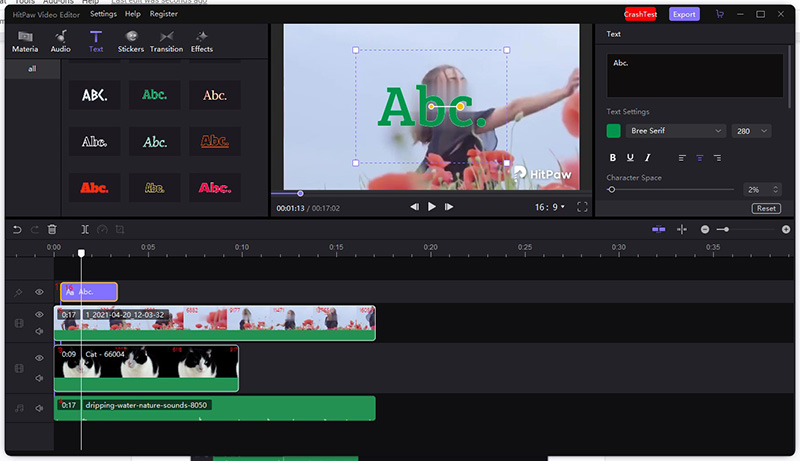
Step 3: Adding Text effects
HitPaw Video Editor comes up with eye-catching pre-made text effects which could be applied to your video. To add the text effects, click the Text icon and select the appropriate option. After selecting the text effects, you can preview and then drag the text effects to the video.
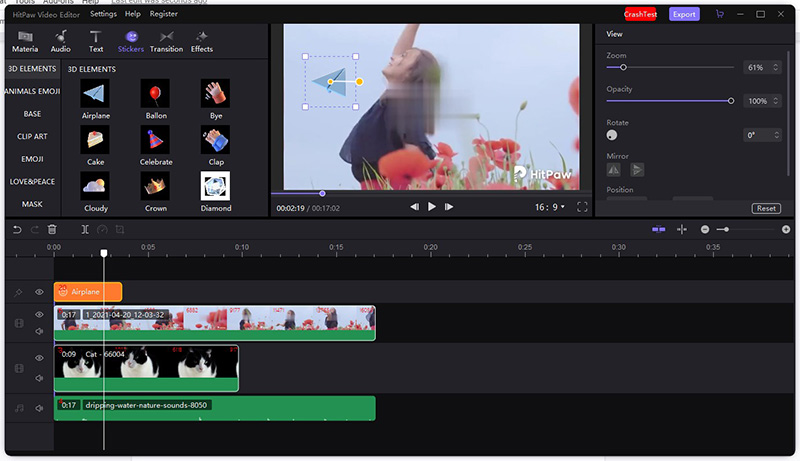
Step 4: Adding Sticker
You can add breathtaking sticker animations to your video by hitting the Stickers icon. Drag the stickers to the video to begin adding them.
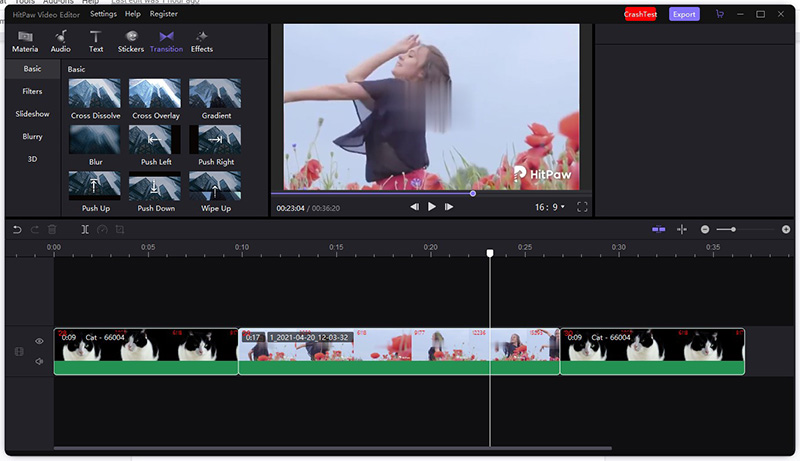
Step 5:
Adding eye-catching transitions to the video can take the quality of the video to the next level. You can apply the terrific transitions to the video by hitting the Transition icon. Search for the transition effect and click on the desired one. When you add the transitions to the video, the screen splits into two screens without affecting the video quality.
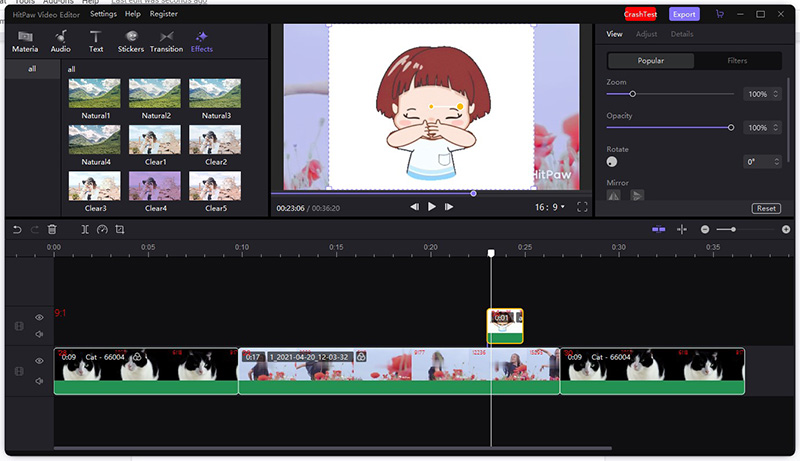
Step 6: Adding Filters
Tap on the Filters icon to explore all the available effects. Drag the desired filter to the timeline of the video editor, and doing so helps you to apply the gigantic effect there.
Step 7:
Once you add the animations to the video, click ok on the Export icon to download the edited file.
Conclusion
Those who need to learn more about video editing might not be familiar with video animations. You can review this guide to learn how to add Animation to a video. HitPaw Video Editor is the best editing tool for applying gigantic and eye-catching animations. It empowers you to apply video animations without compromising the video’s quality.
FAQs
Q1: How can I make text animations in my videos more engaging?
If you intend to add animated text to the video, you must ensure that your selected text design is attractive and admirable. Opting for a third-party text style might be handy, but third-party text styles aren’t required when using the HitPaw Video Editor. HitPaw Video Editor has substantial text animation styles that can make your video look watchable.
Q2: Are there copyright considerations when using pre-made Animation presets?
If you’re using the free pre-made Animation presets, these animations indeed come with the copyright considerations, and you must not be using them for commercial purposes. However, you can use the purchased Animation presets for whichever you’d want to.
Follow Techdee for more!